Taxonomy Components
To topHi there. We’re assuming you’re already comfortable with what a taxonomy is, so we’re diving into the components of a new taxonomy and how to create a new taxonomy.
A Classr taxonomy has these components:
- Taxonomy “Levels”. Generally, we recommend the fewest number of levels in your taxonomy to reduce complexity. Each taxonomy level has a name, e.g. “Category” or “Subcategory”. Usually the names are fairly generic, but they should show hierarchy.
- Entities. This is what your taxonomy levels are organizing. What you name your Entities, overall, is important and is usually relevant to that specific taxonomy.
- Alaises. Specifically used for data cleaning use, these are common misspellings or variations of your entities.
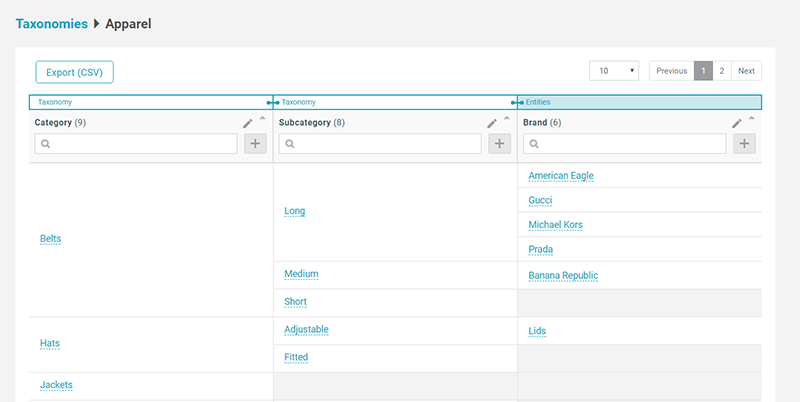
Here’s what a simple Apparel taxonomy, for example, may look like in Classr:
Starting the Process
To topAfter logging in, you’ll find yourself in the main Classr dashboard. Here you’ll be able to access all taxonomies and their APIs.
To get started creating a taxonomy, click on the “Create Taxonomy” blue button in the top left.
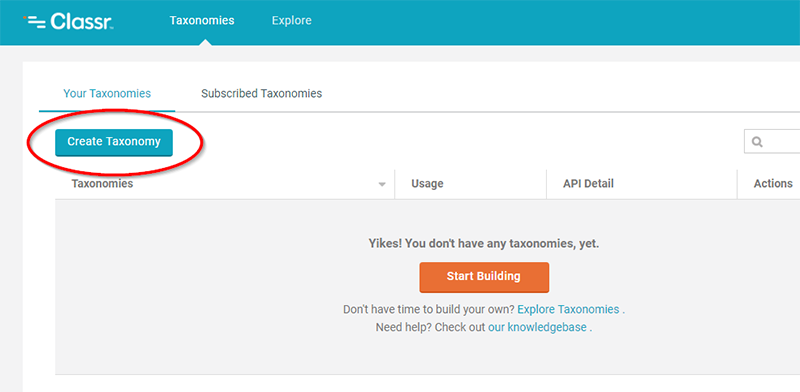
Note – if you find yourself receiving a message that you have reached your taxonomy limit, it’s time to upgrade your plan.
Name Your Taxonomy
To topNext, you need to name your taxonomy and give it a description.
Pick a name no longer than 40 characters.
For your description, pick a description no longer than 75 characters. Note, your description and name will be shared on your dashboard for you to see, but should you choose to display your API in the Classr Marketplace, it will be exhibited there, as well.

Identify Levels
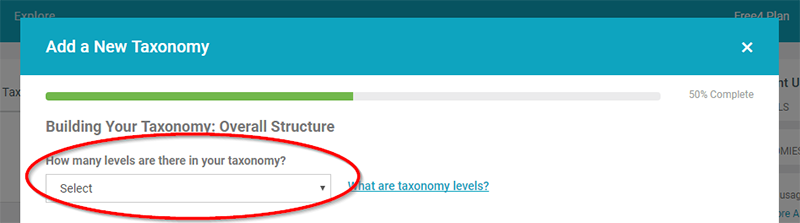
To topNext, you need to identify how many levels are in your taxonomy, with 1-5 being the available options.
As mentioned earlier, taxonomy levels represent the hierarchies needed to organize your entities. We encourage a “less-is-more” approach here, as it reduces complexity.
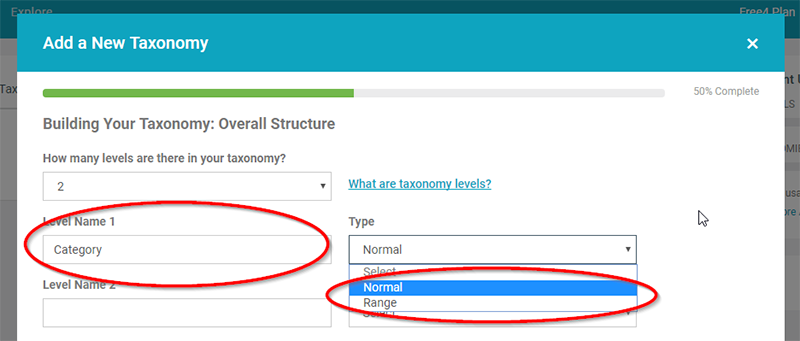
Level Name, Type
To topOnce you have identified how many levels you want to have, then you need to name each and identify the “Type”.
There are two options: Normal and Range.
A “Normal” taxonomy level is appropriate for situations where that content of the level are standard names (no integers or numbers). Specifically, selecting this means Classr will think of the level content as a string. For example, a “Normal” level in apparel may be used for “Pants”.
A “Range” taxonomy level is appropriate for situations when a taxonomy level represents a numeric range. When you select a range type you will be required to put in a minimum and maximum value, as well as a unit of measure for each level. See more below. An example of a range type may be the following three items: minimum, 20 + maximum, 30 + unit of measure, inch.
Range Type
To topShould you have selected a “Range” type, you will be prompted to also identify all units of measure you think you will need. This may include, for example, “in” and “ft” for inch and feet, respectively, should you be using imperial measurements. If using metric measurements, you may need to add “cm” or “m”, centimeter and meter, respectively.
Make sure to include all units of measure you may think you will need!
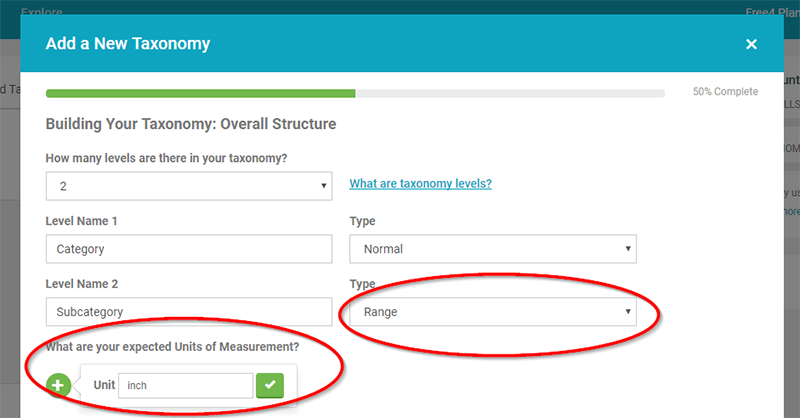
Here’s what it looks like to put in multiple units of measurement:

Entities
To topNext, you must choose if you’d like to include entities in your taxonomy or not. You should make this decision based on if you want to create just the taxonomy levels, at which you would choose “no”, or if you want to additionally include entities, in which you would choose “yes”.
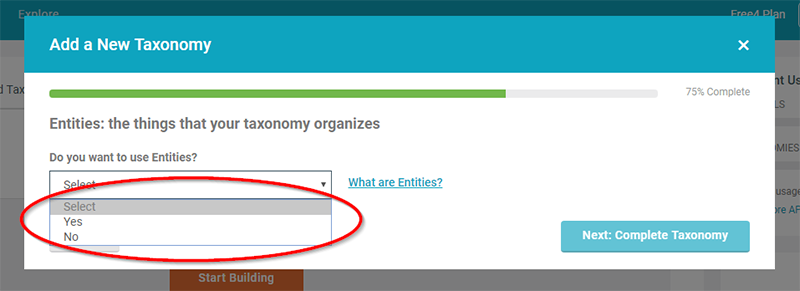
If you have selected “No”, you’re all done and it’s time to start filling your taxonomy! If not, continue.
Once you’ve selected “Yes”, you can use either 1 or 2 entities. To understand this, think about cars. Should you be building an “Auto” taxonomy, you would need two entities, one each for “Manufacturer” and “Model”.
If you just wanted “Manufacturer”, only, you would then only need one entity.
Once you’ve selected your entity number, you need to name them.

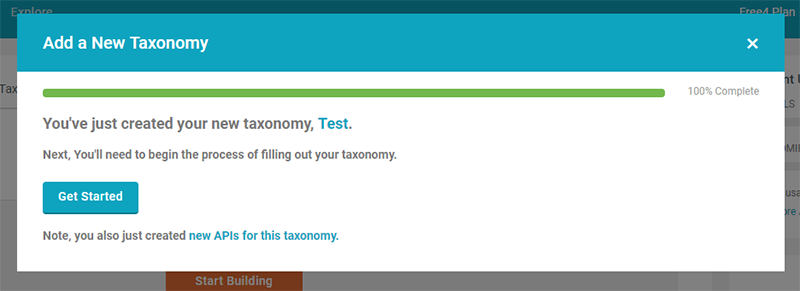
After that, you’re all done with taxonomy setup! Next step, filling your taxonomy.