
What is it?
To top“Classr for Sheets”, also known as Classr Flow, is a Google Sheet Add-On that allows a user to implement the taxonomy and data cleaning capabilities of their Classr account in a custom data cleaning workflow. It allows non-technical users to easily create a one or more step data cleaning process using a simple, easy-to-use interface.
Classr Account Setup
To topTo get started, make sure you have created a free or paid account and you know how to access the authentication details of your Entity API(s).
Also, you’ll need to have created a taxonomy that uses entities (a quick review of the structure of a taxonomy).
The Google Store
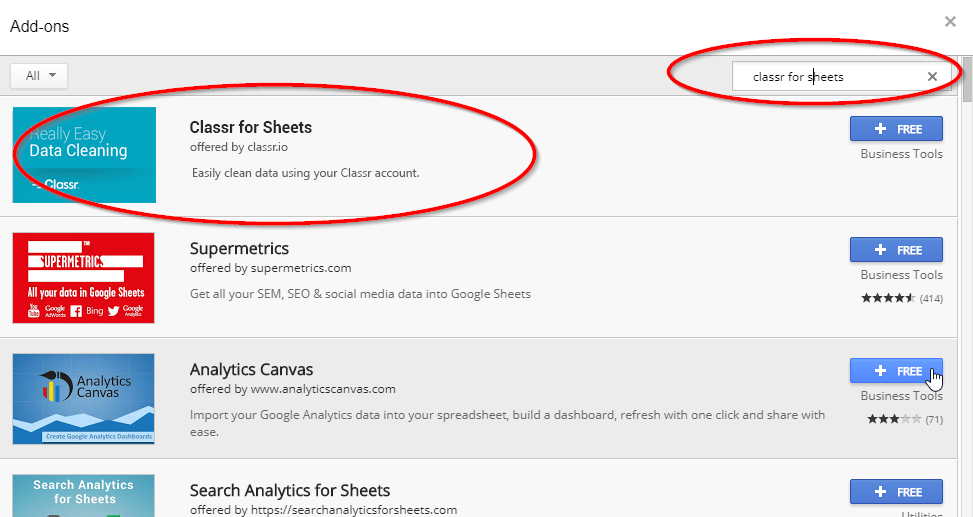
To topThen, once your Classr taxonomy is setup, within Google Chrome visit the Google Sheet Add-On store by clicking on “Add-ins” > “Get Add-ons…”

Want direct access? Here’s the direct link.
From there, you’ll see the Google Store interface. Search for “classr for sheets” to find the Add-on. To install, click the “FREE” button, below the search. You’re all set.
Initiating
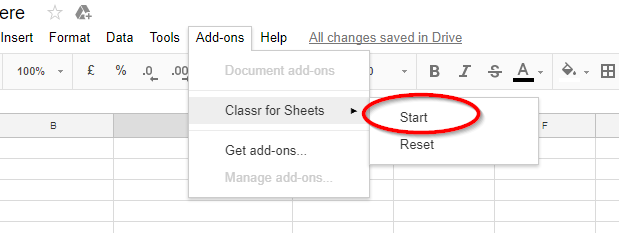
To topOnce installed, open the Google Sheet which you’ll be cleaning. In terms of format, any format is fine as you’ll be able to select the column to clean – anywhere in the worksheet – using Classr Add-on controls.
Then, start your Add-On by going to the Add-On menu, clicking on “Classr for Sheets” and click “Start”
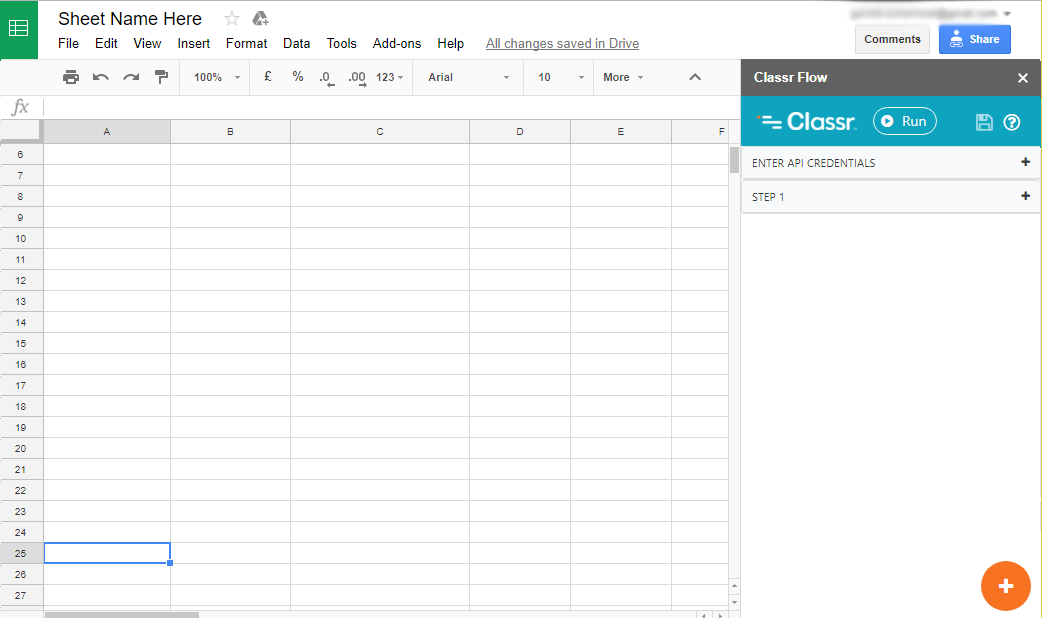
Below is what you should see at this point.
Key Components
To top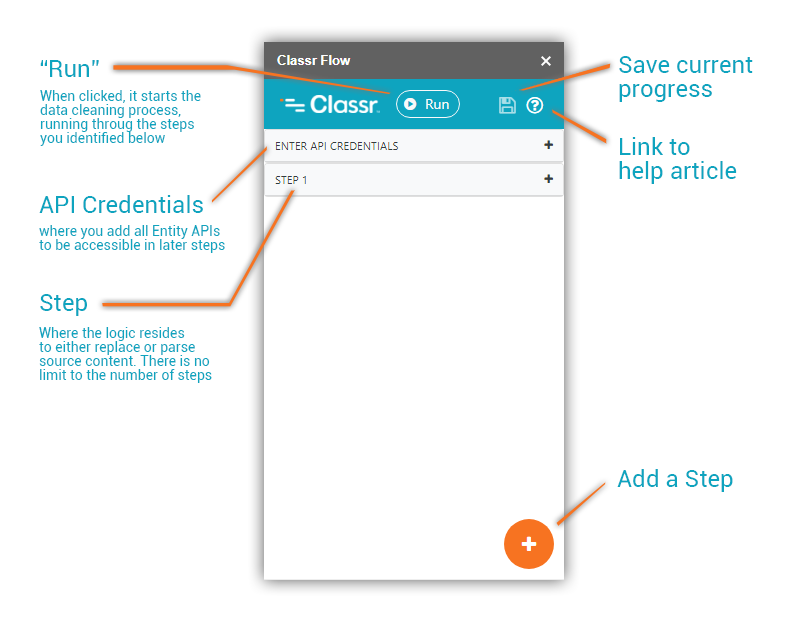
Two important data cleaning concepts to understand: Replace vs. Parse.
“Replace” takes the supplied content and cleans the entities observed in the content and returns the complete, whole content.
“Parse” identifies the observed entities in the content and removes (parses) them into a new cell location in the worksheet, which you define.
We’ll touch on these two concepts again, in just a second.
Add API Credentials
To topClick on “Enter API Credentials” and enter the API details for each of the taxonomies you’d like to use. By adding an API (any number is possible), you will get access to its cleaning capability later.
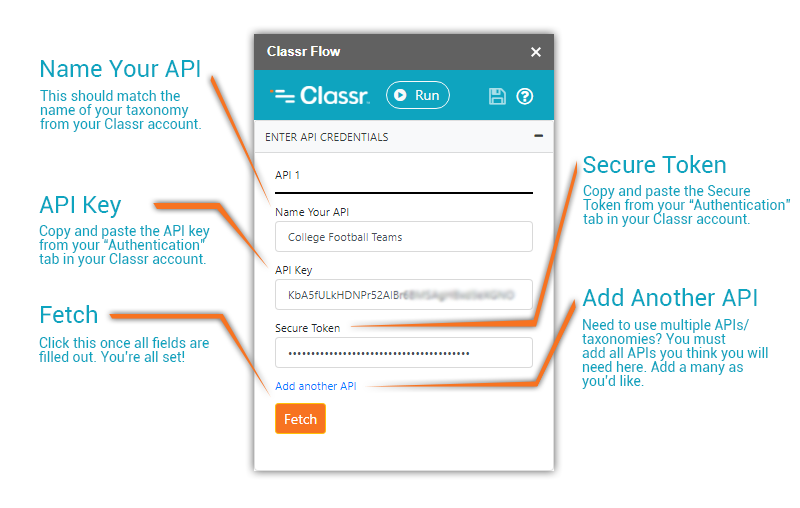
Below is a screenshot of the Classr web interface, showing you the location of the API Key and Secure Token.

Once you have added your APIs, next add cleaning steps.
Add Cleaning Steps
To topA few critical things to know:
- There is no limit on the number of steps you can create
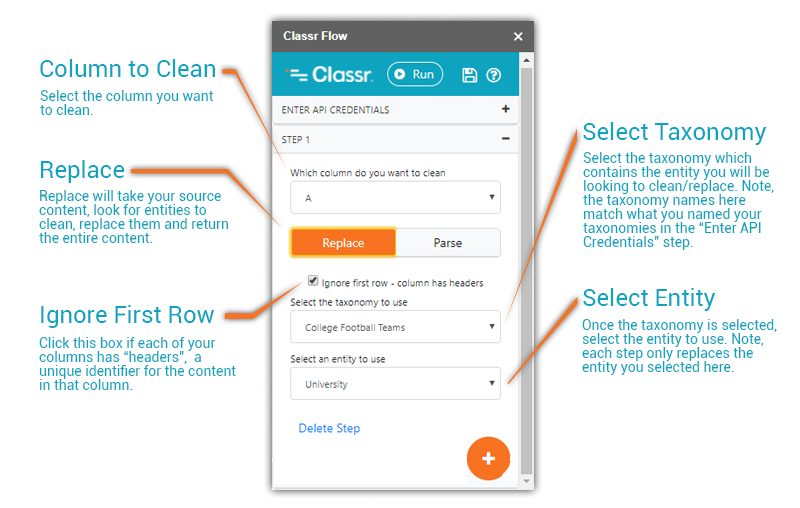
- In each step you must select one of two actions: Replace or Parse
- You can connect steps – the results from one can be the input of another
Now, let’s add our first cleaning step – “Replace“.
Replace is the ideal choice when you already have well structured data and/or you the data being cleaned needs to be returned in its complete form, just cleaner.
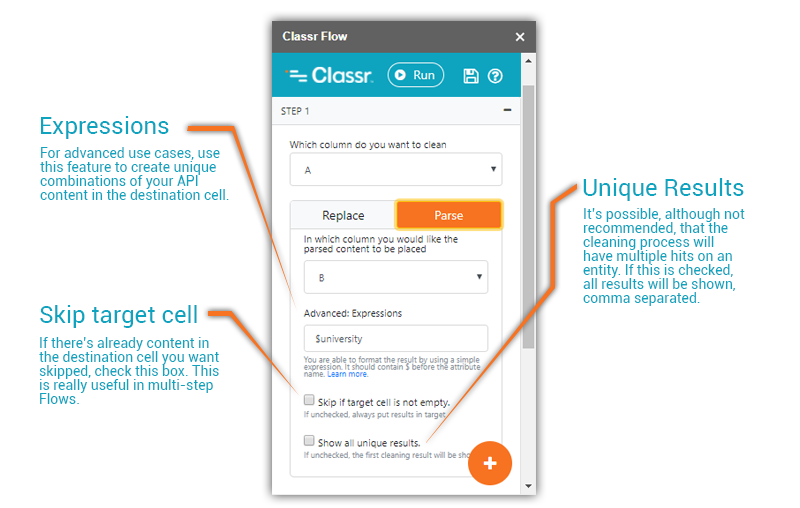
Now, let’s investigate the other cleaning option – “Parse“.
Parse is the right choice when you have content that is less structured and you have the need to “parse out” or extract the entities you are looking for.
Parse is set up the same way as Replace (select column to clean, identify taxonomy and entity to use) but adds unique functionality, which we analyze below.
That’s it! Now, you know everything you need to get started. Get going building your Classr Flow!
Looking for advanced tactics using the “Expressions” feature? See below.
Advanced: Expressions
To topFor more advanced use cases, use this feature to reorder contents of your API’s response body. Here are a few key things to know:
The entity you select is critical.
We generally recommend you select the entity that is deeper in the taxonomy, as it provides the most extensive response body. For example, if you have a College Sports API and “University” “Team Name” are your two entities, select Team Name. This will always give you access to the most extensive list of filter parameters/attributes in the response body (more below).
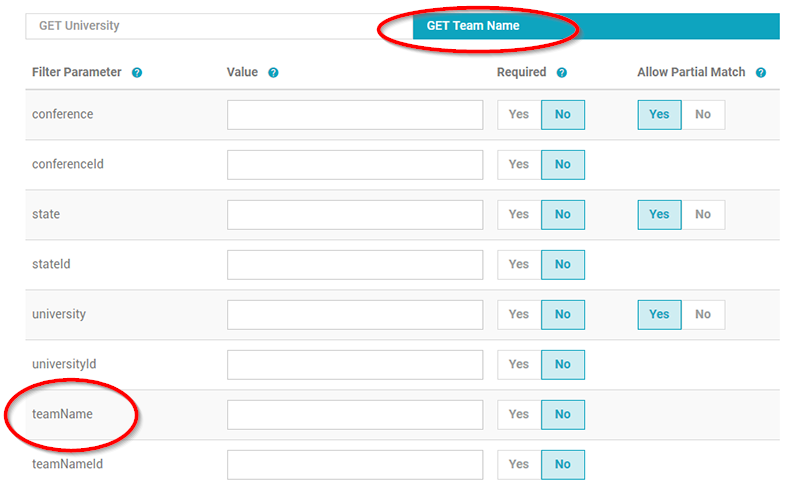
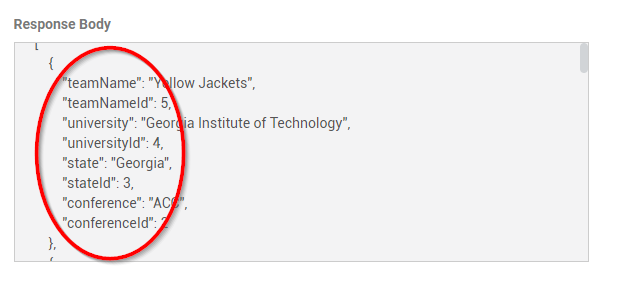
You need to be aware of the response body for the entity you select.
To do this, within Classr, click on your API and go to the “Entity APIs” tab and click “Call API”. The contents of the response body are the available options for your expression.
Know how expressions are formatted.
The format is “$dataAttribute”, where dataAttribute is visible in the response body for the respective Entity API (we also call them “Filter Parameters” in the API docs interface). The format is standard camelcase. For example,using the example above for a College Sports Taxonomy, to display a Team Name, you would use “$teamName”.
Any combination of response body attributes is possible in your expression.
The format of your expression should represent what you want to display in the destination cell. If, for example, you wanted to display the University Name and Team Name in one cell, your expression would list these in the following order: “$university $teamName“.